Showing posts with label Recipes. Show all posts

Thursday, July 18, 2013

Lemon Swiss Chard With Elephant Garlic

Rhubarb Swiss Chard
Inspiration in the kitchen is a wonderful thing when it brings success and last night was a big success with some Swiss Chard.  So here's the latest recipe from my inspired kitchen.  

A good friend had given us a generous bag full of beautiful Swiss Chard that I had been using in salads this week.  But that bag was taking up too much room in the fridge so it was time to cook it up.  I had no idea how I was going to cook it but I just knew it would make the perfect side dish for the fish and potatoes I was planning for dinner.

Being someone who does more cooking by the seat of my pants than from recipes I blew off looking for a recipe and just began tossing things I had into the pan.  I had just finished prepping the fish for the oven and had some left over lemon zest on the cutting board that was making my mouth water so I decided to use it in the chard. 
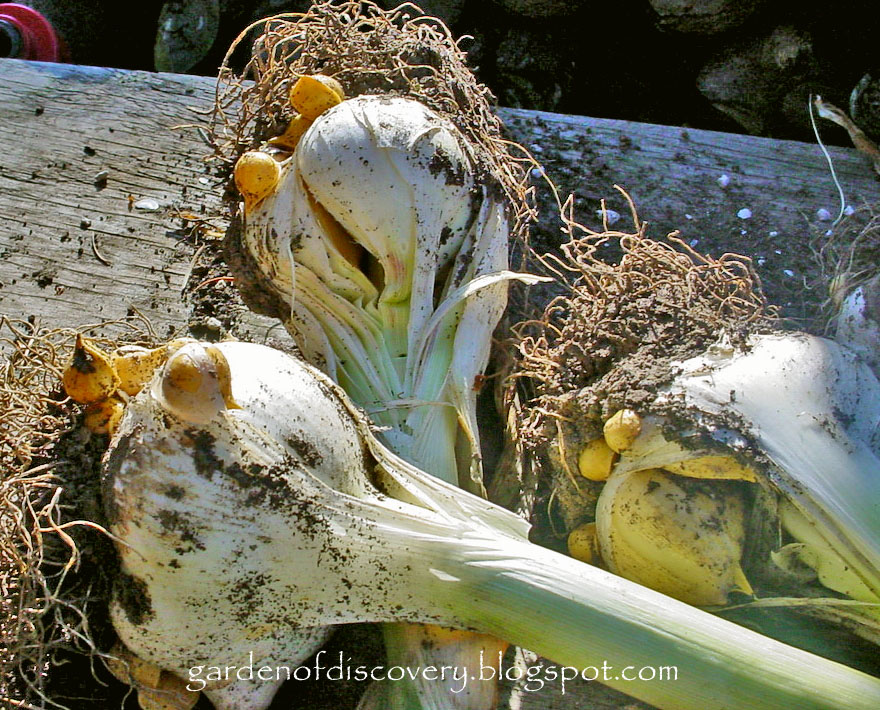
The Elephant Garlic at harvest time
I have had elephant garlic sitting next to the stove for months, literally months, it is from last year's harvest, and because of my neglect it was almost jumping up and down on the counter like a child with it's hand raised saying "Pick me, pick me!"  Well it sort of was, but it was more likely the guilt of having not used it that was talking. 

By the way, is it just me or does anyone else have this happen; you get into the kitchen not knowing how you will prepare something and suddenly it is as if ingredients almost seem to speak to you, igniting inspiration to the point of being able to taste how things will turn out?  I swear that is exactly what it felt like was happening last night and the results were fabulous!  I absolutely loved how the fresh lemon zest gave this dish a really refreshing flavor.  The fact that the chard is much milder in flavor than spinach made it all the more perfect.

Lemon Swiss Chard with Elephant Garlic

You need enough Swiss Chard leaves with the midrib removed to fill a stock pot or dutch oven.

In the bottom of the pan place the following and heat to a simmer.
1/2 teaspoon fresh lemon zest (or half of the zest of a whole lemon)
1 cloves elephant garlic sliced thin
2 Tbsp white wine vinegar
1/2 cup water
 
Next add the Swiss Chard...Sprinkle with kosher salt and fresh ground pepper to taste.   Keep in mind you can always add more later so don't put in too much.

Place the lid on the pot and cook on medium, turning every so often cooking until nicely wilted but still bright green.
You may want to have some vinegar to sprinkle on after it's dished up for those who like tangier greens like my hubby does but this on it's own is a simple and lovely dish.

This took maybe 10 minutes to cook including prep time.  Now that's what I call good food fast. 

ENJOY!


Copyright © 2013 by Patty Hicks
All rights reserved. No part of this blog may be reproduced or transmitted in any form or by any means, electronic or mechanical, including printing, recording or by any information storage and retrieval system without written permission from the author, except for the inclusion of brief quotations in a review. All reviews must include author's name and a link back to this blog.


Thursday, November 22, 2012

Memories of Mom and Honey Bread Careen

Honey Bread Careen Cinnamon Loaf

This time of year evokes so many memories around food and all of us have them no matter how simple or elegant our celebrations were and are today.  This year I decided it was about time to pass along one of these traditional foods I love to my son and granddaughters, Honey Bread Careen.

During the holidays my mom would bake up a huge batch Honey Bread Careen dinner rolls and at least one pan full of sticky buns.  They were so delicious we all had at least two dinner rolls if not more for dinner.   They were soft and little sweet, made even more irresistible with a pat of butter that would melt into the warm bread and honey drizzled on top.

Cinnamon bread toast and eggs for busy mornings

When I mixed up the batch for today's Thanksgiving dinner it made such a huge amount it gave me opportunity to make the rolls and two large loaves of cinnamon bread, one for us and one to gift my son and his family with.  The cinnamon loaf makes the most wonderful toast in the world, perfect for the busy holiday season.  And now that I have you all drooling I suppose I better get busy and share the recipe.

HONEY BREAD CAREEN
Bake at 400F ten minutes, then 350F for twenty minutes
5 cups water (divided)
3 cakes yeast
1 tsp sugar
1.25 cups powdered milk
1.25 cups peanut oil
1.25 cups raw honey
2 Tbsp kosher salt
15 cups all purpose flour
Additional flour for dusting work surface and to add to dough as needed

Heat 3/4 cup water to between 100 and 110 degrees F, add yeast and sugar and stir to dissolve.  Let rest for about 5 minutes until yeast mixture nears double in size. 
NOTE:If the water is over 110F it will kill the yeast and if under 100F the yeast will not activate properly so temperature is key.

In a very large bowl dump the remaining 4.25 cups water (I used 90F water to speed things up a bit), powdered milk, honey, peanut oil (also warmed a bit) and salt, stirring well to blend.  Next stir in the yeast mixture and then add the flour.  I added the flour 5 cups at a time, mixing as I went which seems to work best.  Once the last 5 cups are in you'll need to get both hands in there and start working the dough to incorporate it well.  This is a lot of dough and will take some strength.


Once everything is incorporated sprinkle your work surface with some flour, place the dough on it, sprinkle a bit more flour on top of the dough and begin kneading it.  The added flour keeps the dough from sticking to things too much.  Reapply flour as needed during the kneading process.  I think I used between 1/2 and 1 full cup extra flour for dusting.  The kneading takes some muscle due to the weight and volume of the dough so be prepared. 

As you begin to knead the dough it will stick to your hands some until enough flour has been worked into the dough.   Keep kneading it for 10 to 15 minutes.  You will feel the dough will become less lumpy feeling and more silky when the kneading is near done.

Grandma, what a big bowl you have!

Place the kneaded dough in a very large clean bowl that has been oiled so the dough won't stick to the side.  (I just washed and used the bowl I mixed everything up in.)  Lightly oil some plastic wrap and place it over top and drape with a towel.  Place the bowl in a warm spot (not hot) or over a large container of very warm water.  I used my Dutch oven with very warm tap water.  Let the dough raise for about 2 hours or until doubled in size.  Punch it down and repeat.  Now you can shape into rolls of loaves, let raise to double in size and bake.  I also should note here that you can keep this dough refrigerated for a week.  It takes longer to rise that final time before baking but all good things are worth the waiting for.

The dough, doubled and silky to the touch

A note here...I find preheating the oven for 30 minutes really does help breads to bake best.  The rolls took the recommended amount of time the recipe above states.  I did have to cover them with foil for the last 10 minutes to avoid the tops getting too brown.

Eighteen large dinner rolls

I made the rolls in disposable aluminum casserole pans which work really great for heating them up in the oven the next day like we are having to do.  Make the dough balls about the size of a small apple and leave space between each row.  A 9x13 baking pan would work well for the rolls.

Cinnamon bread loaves are rolled with ends folded under

CINNAMON BREAD
The remainder of the dough I worked into a flat, semi regular rectangle shape about 1/2" thick.  Sprinkled a healthy amount of cinnamon and about 1/2 cup of sugar and melted 1/2 cup of butter which I drizzled over top and spread around with my hands like a 5 year old...FUN!   Next I carefully rolled it up, cut the roll in half and transferred the loaves onto a sprayed backing sheet, folded the ends under and left them to rise beneath the oiled plastic wrap I had used previously on the dough bowl.  They were ready to go in the oven by the time the rolls were finished baking.

Bake the bread at 400 for 10 minutes and then reduce the temperature to 350F to finish baking.  You will need to cover the top of the loaves with foil about 20 minutes into the baking time to keep them from getting too dark so have some ready.  This bread took about 20 minutes longer at 350F to finish baking.

So there you have it.  A family tradition that I hope will bless your family too. 
Have a wonderful Thanksgiving everyone.  And may God bless you as you gather, be it with family, friends or with strangers.

Final note...I am sharing this recipe in remembrance of my mother, Betty Fitch, who died suddenly at the age of 58, thirty one years ago.  She was the kindest, most patient woman I know and a beautiful Christian woman who taught me by how she lived, how to hold fast to God in life, no matter what the circumstances.

Friday, October 14, 2011

Beef Stew Ala Mrs Patty

Mrs Patty's Stew

There is nothing that says Fall quite like stew made with fresh tomatoes and a host of other veggies.  My mom used to make stew often.  It was one of our favorite meals and still is today.  Stew is one of those beautiful meals where exact measurements of the vegetables isn't really necessary.  I find I put in more or less of some things as I have them available and often don't add in tomatoes at all which gives the stew a completely different character, less acidic but still just as hardy.   I make stew a lot but am notorious for never measuring but doing things by taste and it always seems to work out.  It was fabulous last night and even better this evening.  Here's what I did....

Beef Stew ala Mrs. Patty
1 pound sirloin steak trimmed and cut into cubes (about 3/4" square works good)
2 tbsp grape seed oil
*salt
*fresh ground pepper
1/2 to 1 tsp dry thyme
3 tbsp dried parsley
1 generous tbsp fresh garlic chopped fine and smashed a bit
1 large onion diced rough (large pieces)
2 medium carrots peeled and cut into squarish chunks about the same size as the beef

2 stalks celery diced

8 cups potatoes scrubbed and unpeeled cut to 1" pieces (approx)
1/4 cup finely diced red bell pepper
5 to 6 cups peeled tomatoes chopped (garden fresh if you have them)

1/2 medium size head cabbage rough chopped  (I used red cabbage but green will do fine too)

2 bay leaves
1 tbsp Better than Bullion organic Beef stock concentrate
Water to fill

Sprinkle meat with a bit of *salt (about 1/2 teaspoon or less) and give it a good sprinkle of *fresh ground pepper (1/4 to 1/2 tsp) and stir meat to coat evenly.  With the burner on high, heat up oil in a heavy bottomed stock pot or dutch oven. When the hot begins to show ripples add the meat spreading it out in the pan as best you can.  Check in a couple minutes to see if the meat is releasing from the pan bottom and stir well when it does.

Continue browning the meat, stirring every minute or so and when the beef is nearly done browning toss in the chopped onion and continue cooking stirring often until the onion is about half done and has started caramelizing a little bit.

Next add the carrots, garlic and celery and continue cooking, stirring often to avoid burning and cook until they begin to release the caramilization on the bottom of the pan. (It won't release completely so don't worry if some sticks)

Add the rest of the ingredients to the pot and fill up the pot with water, heat to a boil and reduce heat to simmer partially covered. Be sure to check the pot once in a while and taste the broth.

Note:
*I add salt to taste adding 1/2 to 1 teaspoon at a time until its close and then in pinches until I like it.  I have found if I cook it with less salt the flavors of the vegetables are more pronounced and sweet.  This also keeps me from over salting the pot (which I've done before).  You can always add salt later but cannot take it out if you put in too much.

*Use 2 cups of Russet potatoes which fall apart more in cooking and help add substance to the broth
*I ground the pepper over top so it was not measured but was about 1/4 tsp with more ground on top of each bowl full at serving.  If you use standard pepper use 1/4 tsp and then add to suit your taste.

*For a richer broth you could use drippings from roast beef or add a couple tablespoons of butter.(Everything is better with butter.)
*I added a dollop of sour cream to each bowl at serving which added a really nice counter flavor to the vegetable broth flavor.  It reminded me a lot of the flavor of the borscht our Russian neighbor makes.

Stew...its beautiful food.
~Patty~